Mailing Forms
Mailing forms allows you to send completed forms to other users for approval and/or further edits.
> Mailing a form
1. Open a form and make your desired edits.
When you have finished editing, save the form to the server. Forms must be saved to the server prior to mailing.
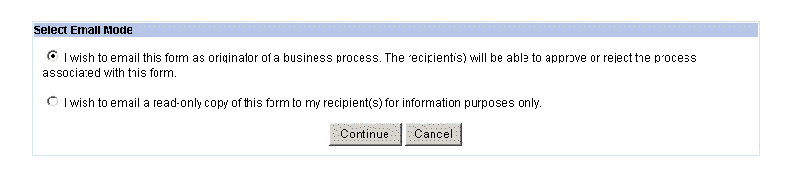
2. Click Email on the Form Editor toolbar.
The dialog box window appears to select the email mode.
The Mail Message dialog box window appears.
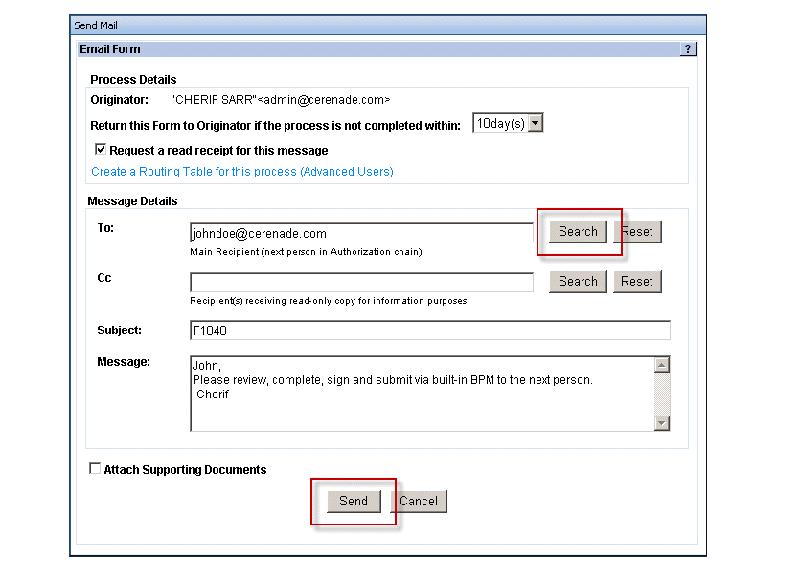
3. Address the message, add a subject, and enter message text.
You can address the message by entering the recipient’s email address, or by clicking on the Search button to locate an address (see instructions for using the address book on the following page).
Note:_ The form is automatically attached to the message. Do not try to add it as an attachment.
4. Mark the Read-only checkbox if you do not want the recipient to edit your form. Leave the Read-only box unchecked for other recipient options. With Read-only checked, multiple recipients can be listed in TO. With Read-only left blank, only one recipient can be listed in TO. Only one editable copy of the completed form is available at any one time, so it can be received only by one person at a time.
See “ Error! Reference source not found.” on page Error! Bookmark not defined. for other recipient options.
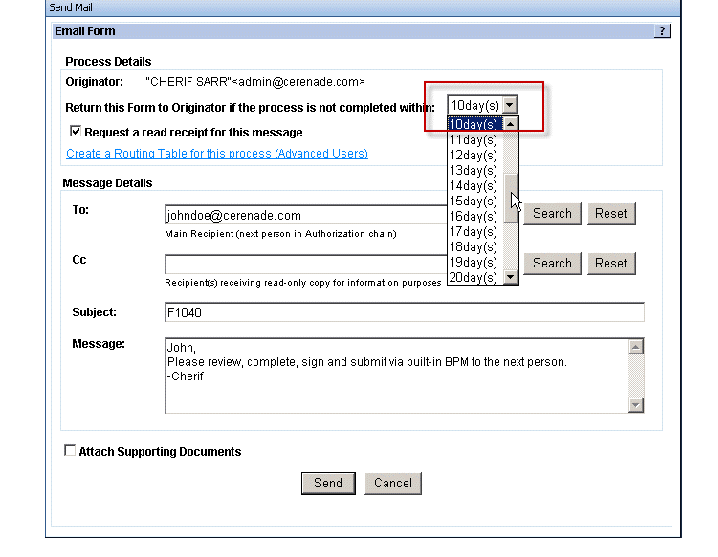
5. Select a time-frame from the Return drop-down menu.
If your message is not processed (Forwarded, Rejected or Accepted) in the time-frame you determine, the form is returned to you.
Note:_ To open a form is not the same as processing the form.
6. Send the message by clicking on Send.
You are notified that the mail was successfully sent.