Routing Forms
Routing forms lets you send one form to more than one individual, in a specified order. This is a beneficial feature for sharing data with personnel throughout your organization, without having to send the same email more than once. Each person along the route can add data to the form and forward the message along the route before it reaches its final destination.
> Routing a form
1. Open a form, make edits, and save.
See � Error! Reference source not found.� on page Error! Bookmark not defined. for more details.
2. Click the Email icon to send the form.
The Mail Message dialog box appears.
3. In the Mail Message dialog box, click theCreate a Routing Table for this process link.
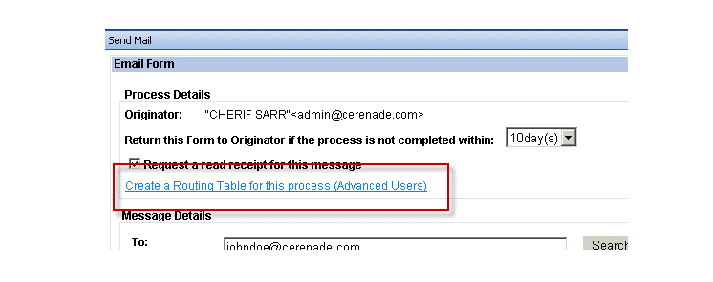
The Routing Builder window appears.
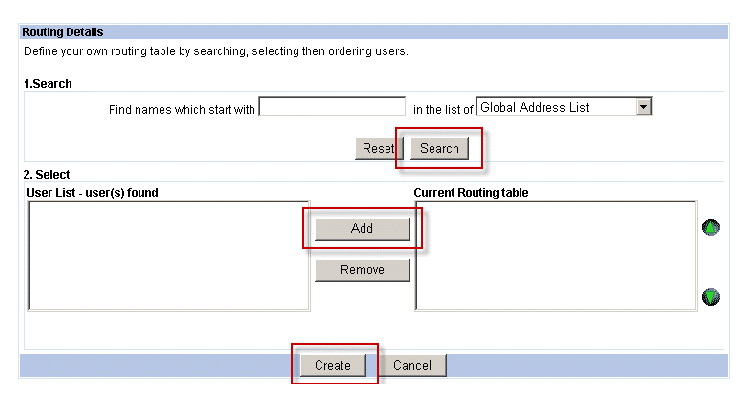
4. Locate mail recipients using the Search field.
Recipient is added to the User List.
Click names to highlight one or more recipients from the User List and add them to the Routing Table by clicking the Add icon. Repeat steps 4 and 5 to continue searching for and adding users. to the Routing Table.

You can change the order of the Routing Table by using the green arrows to the right.
5. Click the Create button when you are finished with the Routing Table.
The Recipients List window appears.
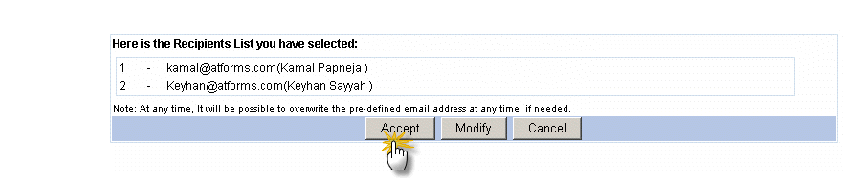
6. If the recipients list is correct, click the Accept button. For further edits to the list, click the Modify button and repeat steps 4 and 5.
After the list is accepted, you can begin routing the form.